Linksys range extenders have changed the game for network speed and stability. It serves network connectivity in the dead spots as well. So, with the Linksys RE6500 range extender, you do not need to purchase a new wifi router for other areas of your house. You can simply install the range extender and increase the network coverage, speed, and stability. We know you are thinking, ’how do I set up the Linksys RE6500 Range extender?’ Well, we will tell you how to do the Linksys RE6500 setup. Read out the following blog and get all the answers to your queries.
Linksys RE6500 Range Extender Setup –
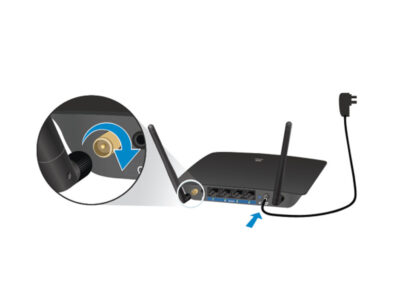
- The first and foremost step is to plug in the Linksys RE6500 range extender into the wall power socket.
- Switch on the PC device you want to access the internet connection on.
- Then, connect the laptop or computer to the internet connection available at your home.
- A window prompt asking for your wifi password will appear on the screen.
- To proceed further, enter the correct password and try to avoid any typing errors.
- Then, continue by opening the web browser you use the most from your laptop.
- From the address field on the web page, search extender.linksys.com web page.
- Now, you will be directed to the login page for the wifi extender.
- In the given boxes, enter the correct user ID and password.
- Then, proceed by clicking on the login button at the rear of the range extender.
- Finally, keep following the on-screen instructions to complete the setup process.
Sometimes, you will see that you are unable to set up the Linksys RE6500 range extender and this can be due to various issues such as web page not responsive, LED light not working, login failure, connectivity issues, etc. So, to overcome these issues and complete the setup of the range extender you have to follow some troubleshooting tips. With the help of these tips, you will be able to rule out the problems easily. Now, let’s go through the troubleshooting guide.
Troubleshooting Tip To Check The Issues In Linksys RE6500 range extender –
- Connect to the high-speed internet through your device.
- Make sure that the wall power socket is functional and there is no short circuit in that.
- Ensure the power supply is regular and there are no inconsistencies,
- Ensure to use the updated version of the firmware of the Linksys RE6500 range extender.
- Make sure that all the wired connections are solid and there is no breakage or damage in the wires.
- In case you are facing issues with logging into the web address, http://extender.linksys.com then check if you have entered the right web address. Correct any typing errors or spelling errors.
- Cross-check for the login credentials if you don’t remember them.
- Finally, if you see the steps failing then the last resort is to perform the reset on your range extender.
Linksys RE6500 Range Extender Ready To Use!

With all the information about the Linksys RE6500 range extender, setup, and troubleshooting tips you are now all set to enjoy a new level of internet connection. Linksys RE6500 setup process is easy and convenient to perform. There are no complicated steps on the way. ‘How do I set up Linksys RE6500 range extender’ is not your worry now. Still, if you have some queries you know where to seek help from/. Call on our helpline number and our technical expert will guide you through.